
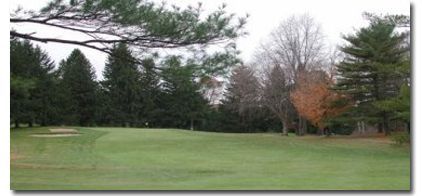
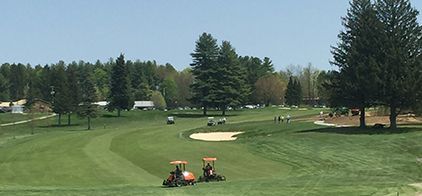
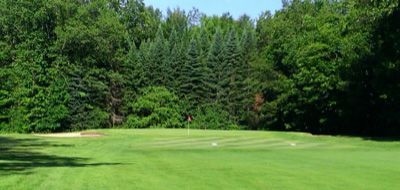
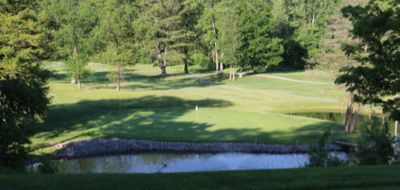
Hole #1
This opening hole is a downhill Par 4 that is a challenging start to your round. The approach to the green will consist of a downhill lie to a Green that is protected by a creek that is only a few yards from the front of the putting surface. This Green surround was just remodeled with new sod and the bunker was reshaped with new sand to allow for consistent playability for miss hit shots. This hole plays as a Par 5 for the Women.
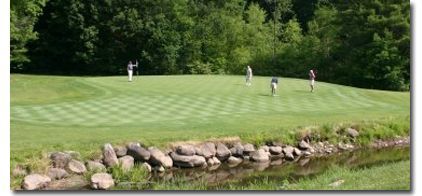
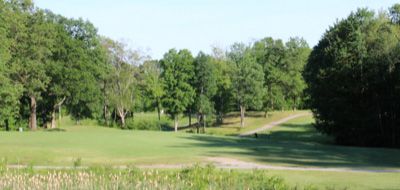
Hole #2
The Par 3 2nd hole offers a generous green and a good chance to score if precise. The creek that runs just in front of the green is deceiving as it jumps up quick if the player doesn't select enough club. The pond on the left of the green can cause issues as the prevailing wind is usually into the players face. This is a great hole to get a 3 and move onto the next.
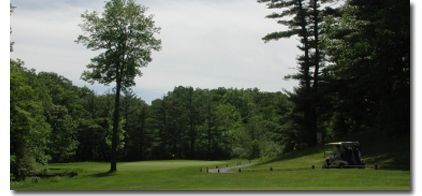
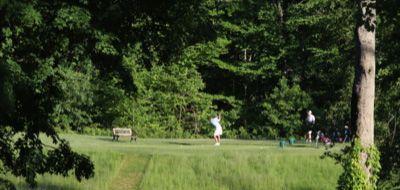
Hole #3
The 3rd hole is a dogleg left Par 5. Although a short par 5, your approach shots will play longer because of the steady incline to the green. The cross bunker that has been recently remodeled will cause players to 2nd guess going for the green in 2. There is a newly remodeled bunker on the right side of the green and all of the turf has been replaced for consistent playability. Once reaching the green surface, a good choice for sure is to keep your ball placement below the hole location.
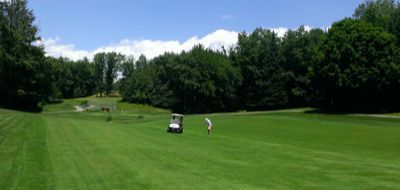
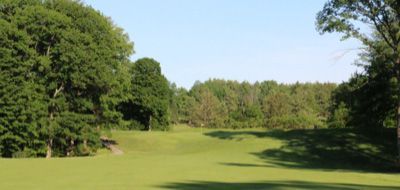
Hole #4
The 4th hole is another dogleg left to an elevated green. This par 4 is needs a precise tee shot to find the fairway to allow for a short to mid iron into the green. There is a creek that can come into play for those trying to cut off a little yardage on the left side. The newly remodeled bunker on the left of the green and the recently remodeled turf once again makes for consistent surfaces if your ball unfortunately doesn't find the putting surface. Another great recommendation here is to leave your approach shot below the hole location
Hole #5
The 5th hole is the hardest hole on the front 9, and second-most difficult on the course. This dog-leg left par 4 has a narrow driving area so it's a must to get your tee shot in the fairway here. The approach shot will once again leave most with a slight downhill lie to a large green that slopes from back to front. The creek that runs in front of the green should not come into play but could force players think about laying up to avoid this penalty area. A Score of 4 is a good number here. This Hole plays as a Par 5 for the Women.
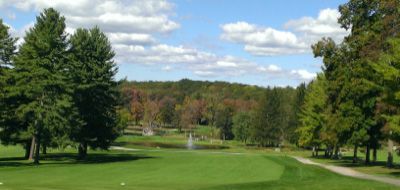
Hole #6
The 6th hole is a great Par 3. This hole plays much different from the tee selection. The Blue tee players will find a challenge on club selection as the prevailing wind is usually in the players face. It is recommended to select 1 more club to ensure reaching the putting surface as this yardage plays a bit longer than the yardage boasts. The tee shot from the White Tee marker is much more player friendly. There is a creek that runs along the entire left side of the hole past the green surface. Scoring a 3 here will definitely keep you in the mix with your friends.
Hole #7
The 7th hole is fairly straight forward. A decent drive will leave you with a mid to short iron to an elevated green with a bunker on your left. This green has been enlarge and the turf around the green has all been replaced.The putting surface has a small tier in it for the player to think a bit on the break of the putt. The false front will allow shots that come up short to roll back down to the player giving them a small pitch up onto the putting surface. Once again, the turf has been renovated to ensure consistent playability if the player happens to miss the green.
Hole #8
The 8th hole is another reachable par 5. A carefully placed tee shot to a narrow landing will allow the player to think about reaching the green in 2. The newly renovated fairway bunker is placed at a distance that many players will be enticed to try to fly it off the tee to shorten up the 2nd shot. The intimidating fescue grass on the left and the right of the fairway may make the player think twice about hitting driver off the tee. The flattest green on the golf course is surrounded by many bunkers on the left and the right. This is a good hole to have an attempt at a Birdie.
Hole #9

The 9th hole is a short Par 3 that is heavily protected by a deep bunker in the front and on the sides and large mounds in the back. This small flat green is a great time to hit a precise shot as to make an attempt at a Birdie. The wind can definitely mess with a players mind as it usually blows from the left to the right. A good hole to pick one up on the field with a good iron shot.
Hole #10
The 10th hole is the longest on the course. This straight away downhill Par 5 plays a bit longer than it measures. There is a creek guarding the front of the green that will second guess the player trying to challenge making it there in 2 shots. Laying up to the 100 Yard Marker is always a safe option and will still give the player a realistic chance at a Birdie putt. The green is one of the flattest on the golf course but does have a few tricky breaks depending on the days hole location.
Hole #11
The 11th Hole is a short Par 4 that can give the player a very realistic opportunity for a Birdie try. Some of the players with lots of length off of the tee can have a chance at an eagle putt. But, there is always a risk with the small pond on the right side of the green that can present a problem if the tee shot is not precise. The green is a tricky one that is not very large. The recommendation here is to be below the hole location if it such allows. This hole is short in length and a definite Birdie opportunity is available here.
Hole #12
The 12th hole is a difficult dogleg right. The length of the hole can be deceiving. The fairway is one of the narrowest on the course. A tee shot in the fairway is a must as the tree that guards the short left side of the green is in play from the left side. There is a creek located 295 Yards from the teeing ground that could force some of the longer hitters to lay up. This is one of the most difficult greens on the course running from back to front. The slope of this green can be a significant challenge if your shot comes to rest above the hole location. This is a must to keep your shot underneath the hole. A Par 4 is a good score here.
Hole #13
The Par 5 13th Hole is a fun one. This dogleg left layout up the hill is a challenge. The yardage is once again deceiving as the Tee Shot appears narrow from the teeing ground. The tree on the top,left side of the hill is in play from the tee. A high lofted tee shot can carry the tree and allow for a 200 yard or less 2nd shot to the green for the longer hitters. A tee shot to the right side of the tree is precise and will allow the 2nd shot to be able to placed for a short approach on the 3rd. The bunkers on the left and right side of the green don't allow for a missed approach shot. This green is similar to the 12th as it runs from back to front and can allow for some very tricky putts if your ball ends up above the hole location. Once again, Do your best to keep the ball below the hole.
Hole #14
The 14th hole is the most difficult on the course. This dogleg right Par 4 needs a well-placed tee shot to the center of the fairway. The 2nd shot to the green will be a long one with the lie in the fairway of the ball below your feet and feeling like it is running away from the player. If your lucky enough to get your 2nd on the green, You have hit 2 very good shots. The green runs from back to front with not as much slope as the previous greens. This hole plays as a Par 5 for the Women. A score of 5 usually doesn't feel like you have lost anything to Par.
Hole #15
The 15th hole is the longest Par 3 on the course. This is a very underrated hole as the view from the tee is very impressive. This is one of the largest greens on the course from front to back. It is a very clean classical hole that can cause much drama with an offline shot from the tee. The fescue on the right of the green will keep the player thinking from the teeing ground. The Green surface is very fair and has subtle breaks which make it a challenge for a 1 putt. A score of 3 is a very good number here.
Hole #16
The 16th hole is a straight one. A solid tee shot is needed to split this narrow fairway. The approach shot will be to an elevated green that usually plays firm on the surface. A tee shot that gets the player too close to the green will allow for a more difficult approach. The play here is to get your approach shot yardage between 80-100 yards for the best success. If you fly a little long you may end up in a penalty area. The green is rather small but a green in regulation here will lead to a realistic Birdie try.
Hole #17
The picturesque 17th is our signature hole. A short Par 3 that plays from an elevated tee to a perception of an island green. The fescue in the background makes for a visual from the tee of a very unique shot. The green is fairly small so a precise tee shot is important. The green surface has a few tricky breaks but this hole has a definite possibility of a Birdie try.
Hole #18
The 18th hole plays longer than its yardage as it is uphill from tee to green. This challenging hole is a must to get your tee shot in the fairway. You won't get much roll as the tee ball will land into a hill. The approach shot plays 14 yards longer than your measuring device will tell you. The approach to a very small but flat green is a difficult one unless the player is fortunate enough to use a short iron as their club of choice. A small valley short right of the green will make the chip very challenging to the player if their approach ends up there. A shot that flies a bit long will have the opportunity to bounce off the back collar and possibly roll down onto the green. A Par 4 is a very good score here to finish up your round.